Audio recording tips and suggestions
I was going to write this article for non-professional recording but really you are wanting to use the audio for your website, eLearning or other multimedia project and you don't want an amateurish sound you are wanting to achieve professional audio quality on a budget.
I find it amazing how many YouTube clips DVDs have atrocious sound where a built-in microphone is used or a camera mounted microphone is placed 2 or 3 meters from the subject. The result is predictable, echoey, low volume, poor signal to noise ratio, lots of background and environmental noise and a lack of tone.
It doesn't require a studio or exotic equipment to achieve quality sound recordings it only requires a little understanding to easily achieve good quality audio on a budget.
Basically you need to consider three basic principals.
- Get a reasonable cardioid microphone. The section on microphones
- Keep the microphone as close to the subject as possible.
- Choose a location with as little or no echo and environmental noise such as motors, fans, computers, people etc.
There are other considerations but they generally build on these three principals. So here we go.
Microphones
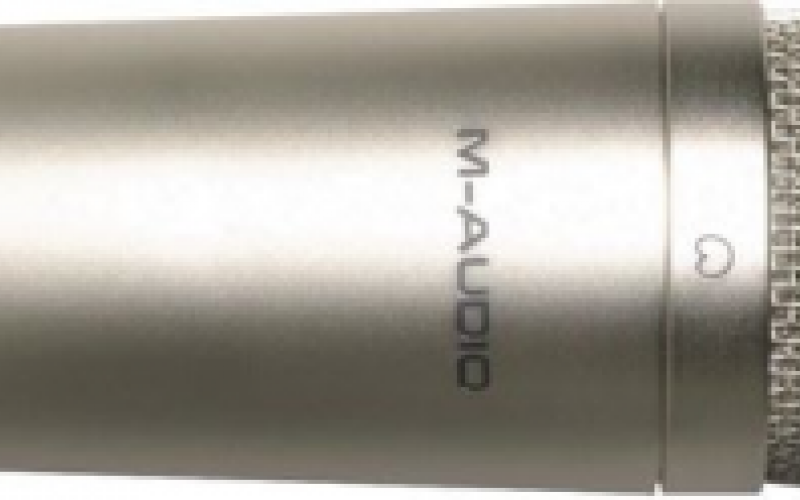

- Do use a large diaphragm condenser microphone with a cardioid pattern or switchable patterns.
When choosing a microphone look at a studio style cardioid microphones with a large diaphragm. Choose a condenser over a dynamic microphone. Don't choose microphones that are used for live performances as they are tweaked for high sound pressure environments and feedback resistance and as a result they are not particularly sensitive nor could you say they are hifi. So avoid microphones such as the SM57 and SM58.
Large diaphragm condenser microphones are more responsive and produce a warmer sound than Dynamic microphones. Large diaphragm condenser microphones have a more natural sound than small diaphragm condenser microphones.
Please resist using your computers built in microphone or a cheap quality external microphone.
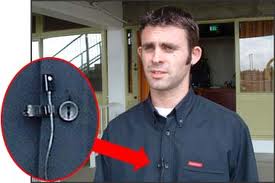
Another microphone choice is a lapel or lavalier microphone.
Polar Patterns
There are many different patterns, but it is important to have a basic understanding of the standard patterns.
The Cardioid pattern is found in most microphones. the advantage of the Cardioid is that it mainly picks up sound from directly in front of the microphone and less pick-up from the sides and little or none from behind. The Cardioid pattern helps to reduce environmental noise and the best method is the point the back of the microphone and the noisiest location within the area you are recording therefore reducing the amount of noise being recorded. A cardioid microphone will be the most useful pattern for recording in and outside of a studio.
Bi-Directional of figure 8 pick up sound from the front and back of the microphone and virtually no sound is picked up from the sides of the microphone. The advantage of this is if your reading from a paper based script, you place the paper in the dead spot (the side of the microphone) therefore reducing and paper and page turning noises. Bi-directional microphones are best used in quiet and non-echo locations. if your recording location is very flat and dead then a bi-directional microphone can help liven up the sound but picking up more of the room sound. Another advantage to the bi-directional microphone is you can have a narrator on either side of the microphone which is useful for acting out of using male and female voices within the narration.
Omni-directional microphones pick up sound from all directions and unless you trying to capture a sound scape or are recording several actors doing a play/narration this pattering is very useful.

Cardioid polar pattern

bi-directional or figure 8 polar pattern

Omni polar pattern
A switchable microphone will have the above patterns.
Windshields a Pop Filters

- Do use pop, blast and windshields to help avoid vocal based pops and wind blasts.
Windshields and pop filers come in many styles from the fluffy "dead cat" to shield against wind in outdoor settings to foam covers. The type we are referring to us a round hoop covered in a stocking type of material [above image]. This type of shield will provide the greatest amount of positioning flexibility so as to achieve the best result. The other advantage with this style of shield is that is has a minimal impact on altering of the speakers voice.
Some people prefer not to use a shield and in that scenario they tend to place the microphone off-axis to the speakers mouth.

The down side to this is a reduction in the bottom-end frequency range. Using off-axis microphones to avoid wind blasts and pop in are designed to be used head-on and when using an off-axis microphone you loose a lot of the functional character of the microphone.
Audio Interface

- Do use a quality digital audio interface such as Apogee Duet, Apogee One or a MicPort Pro
It is tempting to plug the microphone directly into the computers microphone input but don't do it. If you want to achieve high quality audio recording you will need a Digital Analog Converter (DAC).
In a nutshell DACs are a USB input and output audio interface and are designed to provide quality audio in and out from your computer. That being said there are many DAC devices on the market offering different level of quality and affordability.
Some good DACs to consider are:
If you can afford a digital audio interface then use a USB Microphone such as EditorKeys SL300 or the Blue microphones Yeti or Spark or one of the Samson USB microphones.
Do use a microphone stand either floor or desk mounted. If you are wanting to desk mount, look at the articulated arm microphone stands similar to the ones used by radio stations such as the Rode PSA1. It will make it easier to get the microphone into the best position.

Rode PSA1 microphone stand

If possible use a mobile sound booth such as EditorKey’s portable vocal booth. You will improve the sound quality by using a mobile boot or adding soft materials around the microphone.

Don’t use microphone without a shock mount.
- Don’t use the microphone input on you computer, use a USB microphone or a microphone connected to a digital audio interface
Scripts and Teleprompters
 Don’t use paper as it is noisy. If you must use paper, make the print large and place it to the left or right of the microphone so the impact of the paper sounds are reduced.
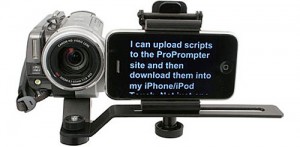
Use an iPhone, iPad or tablet as a teleprompter. Teleprompters are also very useful in maintaining a good rhythm and pace.
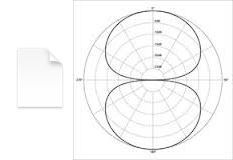
This method works best when using a figure 8 patterned (bi-directional) microphone. Place the paper where the two circles meet in the figure 8, this way the noisy paper in is the microphone’s dead spot.
Conclusion
- Position the microphone as close to the speaker as possible, but we don’t want to hear mouth or guttural sounds nor do you want to have out of control pops and wind blast from the speaker. Words starting with P or H can be a real issue for people without voice training.
- The closer the microphone the better the tonal range, bass response and dynamics this is called the proximity effect.
- The further the microphone is from the speaker the thinner and flatter the sound, also you will hear more room and echo sounds. Also the closer the microphone to the speaker the better the signal to noise ratio.
- Don't yell or speak loudly as this will cause the room to reverberate and echo which in-turn will be picked up by the microphone
- Use audio editing software. There are many very good recording applications out there but many don’t have great editing capabilities and are more geared to music production. Audio editors worth looking at are Audacity, Sound Forge, Cubase, Logic Pro, Pro Tools and Adobe Audition
- Make sure you have water handy to keep the speakers mouth fluid.
- If possible, use a laptop or a noiseless computer. Use a quiet location.
- Turn off anything the makes a sound.
- Use headphones especially closed back full ear cover headphones. Some USB microphones have a headphone out to make monitoring easier.
- Make sure you fully script the talk.
- Break the script down into logical chunks.
- There is nothing worse than missing a potentially great take so just keep recording. Don't start and stop the recording, just keep moving along. If the speaker makes a mistake just get them to keep going over it until they get it. You can edit out the bad lines later.
- Record the same sentence/paragraph/chunk many times. Keep relaxed.
- Don’t over act but try to be dynamic an interesting to the listener.